I love making todo apps when I want to learn a new concept. So in this article, I’ll show you how to build a simple todo app using react hooks.

One thing to mention is that hooks are still in the alpha version of react
Getting Started
react-native init RNHooksTodo
after initializing the project let’s add hooks. As hooks are not yet supported in react native we’ll use this method to add it.
$ yarn add react@16.7.0-alpha-2 react-native@"npm:@brunolemos/react-native"
$ yarn add --dev @types/react @types/react-native
In the package.json file add
"resolutions": {
  "scheduler": "0.12.0-alpha.3"
},
Then run $ yarn install
Nice! Now let’s add vector icons as we’ll use icons in the app
$ yarn add react-native-vector-icons
link the package with
$ react-native link react-native-vector-icons
Please consider that some users are having trouble using this method. Try the manual linking if you are too.
First
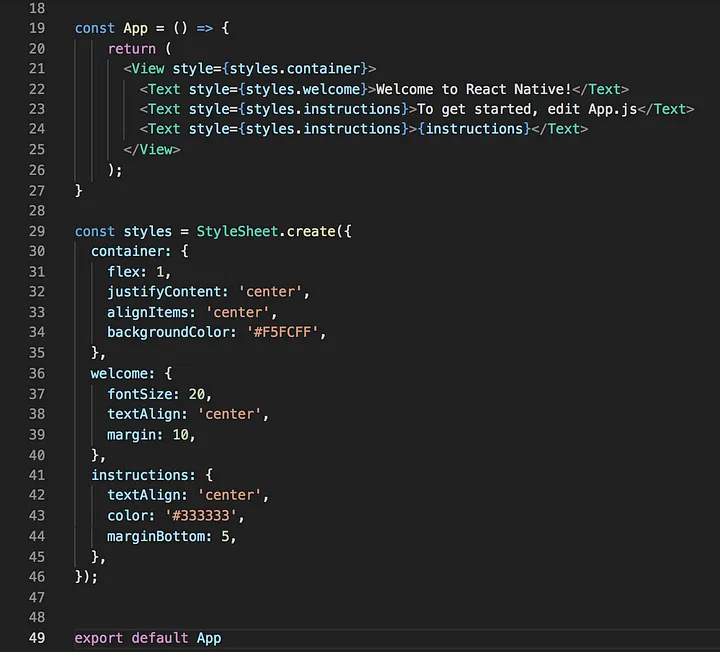
open the project in your favorite IDE then open App.js file and change the class component to be a functional component.
Now run the application in any platform you want, for me I’ll stick with IOS
$ react-native run-ios
if you faced any issue with (reactDevTools.connectToDevTools is not a function) add this to the package.json
"resolutions": {
  "react-devtools-core": "3.4.3"
.
.
.
},
then run $yarn installif everything goes well you should see the welcome screen
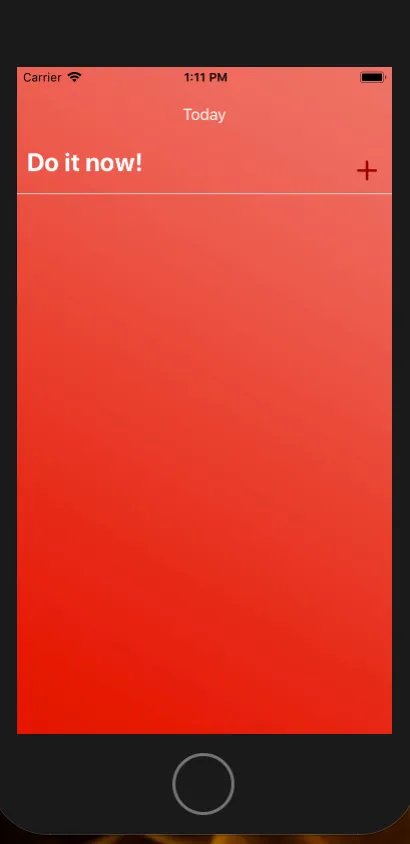
Next. let’s add the background and the text input.
import React from 'react';
import {
  StyleSheet,
  Text,
  View,
  ImageBackground,
  TouchableOpacity,
  TextInput
} from 'react-native';
import Icon from 'react-native-vector-icons/Feather';

const App = () => {
  return (
    <ImageBackground source={{ uri: 'https://wallpapertag.com/wallpaper/full/3/4/d/121586-new-red-gradient-background-2560x1600-for-phone.jpg' }} style={styles.container}>
      <Text style={{ marginTop: '10%', fontSize: 16, color: 'white' }}>Today</Text>
      <View style={styles.textInputContainer}>
        <TextInput
          style={styles.textInput}
          multiline={true}
          placeholder={'Do it now!'}
          placeholderTextColor="white"
        />
        <TouchableOpacity>
          <Icon name="plus" size={30} color="#900" style={{ marginLeft: 15 }} />
        </TouchableOpacity>
      </View>
    </ImageBackground>
  );
}

const styles = StyleSheet.create({
  container: {
    flex: 1,
    justifyContent: 'flex-start',
    alignItems: 'center',
    backgroundColor: '#F5FCFF',
  },
  textInput: {
    height: 20,
    flex: 1,
    minHeight: '7%',
    marginTop: '5%',
    fontSize: 25,
    fontWeight: 'bold',
    color: 'white',
    paddingLeft: 10
  },
  welcome: {
    fontSize: 20,
    textAlign: 'center',
    margin: 10,
  },
  instructions: {
    textAlign: 'center',
    color: '#333333',
    marginBottom: 5,
  },
  textInputContainer: {
    flexDirection: 'row',
    alignItems: 'baseline',
    borderColor: 'rgb(222,222,222)',
    borderBottomWidth: 1,
    paddingRight: 10,
    paddingBottom: 5
  }
});


export default App
at this point, the app should like this
The fun part
In this section, we’ll use hooks to add our tasks.
To add a task the normal way is by declaring a state and updating that state whenever the user clicks the plus sign button.
// instead of using
this.state = {
     todo: [],
     value: ''
}
// with hooks you can use
const [todos, setTodos] = useState([])
const [value, setValue] = useState('')

// updating the state the old way
this.setState({
     todos: [...this.state.todos,{text: this.state.values,
             key: Date.now()}]
})// with hooks
setTodos([...todos, { text: value, key: Date.now()}])
In the code above the only argument passed to useState is the initial state. the array destructuring syntax lets us give a name to the state variables and the method we’ll be using to update it. So by convention, the todos are the state name we’ll be using in the render, and setTodos we’ll be responsible for updating our state. If you want to learn more check this link
So let’s initialize the state in the app component
import React, {useState} from 'react'
.
.
const App () => {
   const [value, setValue] = useState('')
   const [todos, setTodos] = useState([])
the value state we’ll be responsible for storing the user input.
Now we’ll store the user input in the value state variable. Go to the text input and add the onChangeText prop to update our state in user input.
<TextInput
 style={styles.textInput}
 multiline={true}
 onChangeText={(value) => setValue(value)}
 placeholder={'Do it now!'}
 placeholderTextColor="white"
 value={value}
/>
Now after the user clicks the plus sign icon we should update the todos state and display the task in the screen
First, let’s update the todos state to contain the input value. We’ll create a function called handleAddtodo that we’ll take care of it
const App = () => {
 const [value, setValue] = useState('')
 const [todos, setTodos] = useState([]) handleAddTodo = () => {
   if (value.length > 0) {
    setTodos([...todos, { text: value, key: Date.now(), checked: false }])
    setValue('')
    }
 }
.
.
.
Here we check the text input, if it’s not empty we’ll add the value state to the todos and generate a key in order to retrieve the todo in case we want to delete or check a todo, and checked to false
This function we’ll be called whenever the user clicks the plus icon.
<TouchableOpacity
onPress={() => handleAddTodo()}>
....
</TouchableOpacity>
Now it’s time to render the todo. we’ll create a new file called Task.js that will be responsible for rendering the todo. it should like this.
import React from 'react'
import { View, TouchableOpacity, Text, StyleSheet } from 'react-native'
import Icon from 'react-native-vector-icons/Feather';
const Task = (props) => (
    <View style={styles.taskWrapper}>
        <Icon
            name="square"
            size={30}
            color="#900"
            style={{ marginLeft: 15 }}
        />
        <Text style={styles.task}>{props.text}</Text>
        <Icon
            name="trash-2"
            size={30}
            color="#900"
            style={{ marginLeft: 'auto' }}
            onPress={props.delete}
        />
    </View>
)

export default Task

const styles = StyleSheet.create({
    taskWrapper: {
        marginTop: '5%',
        flexDirection: 'row',
        borderColor: '#FFFFFF',
        borderBottomWidth: 1.5,
        width: '100%',
        alignItems: 'stretch',
        minHeight: 40,
    },
    task: {
        paddingBottom: 20,
        paddingLeft: 10,
        marginTop: 6,
        borderColor: '#F0F0F0',
        borderBottomWidth: 1,
        fontSize: 17,
        fontWeight: 'bold',
        color: 'white',
    }
})
The Task component we’ll be responsible for rendering the tasks the user adds.
Now let’s go back to the App component and import the task component with
import Task from './Task'
Then at the bottom of the render method add (before the closing tag of ImageBackground)
.
.
.
 <ScrollView style={{width: '100%'}}>
   {todos.map((task) => (
      <Task
        text={task.text}
        key={task.key}
      />
     ))
 }
 </ScrollView>
</ImageBackground>
Here we pass the text and the key to the Task component. Refresh the Simulator with (cmd + R) write something in the text input hit the plus icon and Voilà. we see tasks been added 🚀.
Last Steps. We need to be able to check and delete a task, for that let’s add two functions to the App component.
const App = () => {
const [value, setValue] = useState('')
const [todos, setTodos] = useState([])
handleDeleteTodo = (id) => {
 setTodos( todos.filter((todo) => {
     if (todo.key !== id) return true
 })
)}handleChecked = (id) => {
  setTodos( todos.map((todo) => {
     if (todo.key === id) todo.checked = !todo.checked;
       return todo;
     })
)}
In the delete function, we use the filter method to remove a given task from todos state, in the second function we use the map to loop through the todos array and check the proper todo.
Now we’ll execute these function from the Task component,
// pass the functions as props
<Task
 text={task.text}
 key={task.key}
 checked={task.checked} _// toggle the checked icon_
 setChecked={() => handleChecked(task.key)}
 delete={() => handleDeleteTodo(task.key)}
/>
In the Task component, we’ll toggle the check icon, set a task to checked and delete a task. Here is the final code
import React from 'react'
import { View, TouchableOpacity, Text, StyleSheet } from 'react-native'
import Icon from 'react-native-vector-icons/Feather';
const Task = (props) => (
    <View style={styles.taskWrapper}>
        <Icon
            name={props.checked ? "check" : "square"}
            size={30}
            color="#900"
            style={{ marginLeft: 15 }}
            onPress={props.setChecked}
        />

        <View>
            {/* if the task is checked toggle a vertical line on top of task */}
            {props.checked && <View style={styles.verticalLine}></View>}
            <Text style={styles.task}>{props.text}</Text>
        </View>
        <Icon
            name="trash-2"
            size={30}
            color="#900"
            style={{ marginLeft: 'auto' }}
            onPress={props.delete}
        />
    </View>
)

export default Task

const styles = StyleSheet.create({
    taskWrapper: {
        marginTop: '5%',
        flexDirection: 'row',
        borderColor: '#FFFFFF',
        borderBottomWidth: 1.5,
        width: '100%',
        alignItems: 'stretch',
        minHeight: 40,
    },
    task: {
        paddingBottom: 20,
        paddingLeft: 10,
        marginTop: 6,
        borderColor: '#F0F0F0',
        borderBottomWidth: 1,
        fontSize: 17,
        fontWeight: 'bold',
        color: 'white',
    },
    verticalLine: {
        borderBottomColor: 'white',
        borderBottomWidth: 4,
        marginLeft: 10,
        width: '100%',
        position: 'absolute',
        marginTop: 15
    }
})
That’s it. Now if you follow all the steps properly you’ll be able to check and delete a task 😅.
At this point, you understand the power of hooks and how they allow creating stateful components without the headache of using classes and binding functions etc…
***Thanks for reading 📚
I hope you enjoyed making this todo app like I did when creating this article. Please Check the repo.